PoC: Expanding Hilt – Part I
So I have been working on & off on an expanding saber..similar to the those hilts that have the exposable crystal chambers/core...etc
except this idea is NOT to reveal anything.. it is a step to make a more 'functional' (moving) type saber.. allowing for maybe smaller footprint (and concealment) into an expandable, longer hilt when needed/being used.
this is NOT finished.. and for those of you who have a problem with projects being posted while NOT completed.. simply fuck off. ![]()
Its in the R&D forum.. and I see people who do placeholder posts all the time.. so if you havent done anything like the above...then speak out.
anyways.. while developing/working on this.. I discovered several paths this could take.. and I also would like to get soem feedback on areas I am un-clear on how to proceed.
This is a long post.. outlining several of the ideas or variations that could be done.. and Im a long winded guy.. again.. if this a problem for you..
ALT + [F4] is a good choice for you right now.
Project goals/tasks or ideas that needed to be accepted or thrown out. (no order)..and to keep ideas out, posted for me to reflect on.
1.) smallest footprint when 'closed'..... (good idea.. nice small footprint).. but when open..what are you 'left' with as a saber?
grips both top and bottom? the extension piece?
2.) when open? form vs function... the function is there.. no doubt.. but when trying to keep/adhere to certain restrictions (like #1 above)..as well as make it visually pleasing.. it somewhat limits normal thinking/ideas.
3.) when closed..how to lock?
* I have a few locking ideas..each fairly unique..
* a outward 'clasp' (so to speak) that locks the top portion down/closed
* a 'threaded' end that is similar to sloth's reveal hilt.. the top section slides down..and can be turned/screwed into the bottom section.. (unscrew it expands..etc)
* a ballbearing/spring type lock.. Madcow used one on his hilts...as well as in use all over the world
4.) when open..how to keep from spinning/rotating.
* as of now..this doesnt need to be implemented.. BUT.. I have thought it out.. (will post pics/drawings really).. and is similiar to the sliding 'rail' chassis system I had been messing with a while back..and should work easy enough..
5.) movement/functionality
* how much movement is enough? or not enough?
there is a 3 way approach to the movement..
you slide the TOP section
you slide both 'core' * top sections
you secure top half..and make the 'code' slide (making the top section move as well of course)
so there is room for several variants..with different movement here as well..
to explain the parts/mechanics:
required:
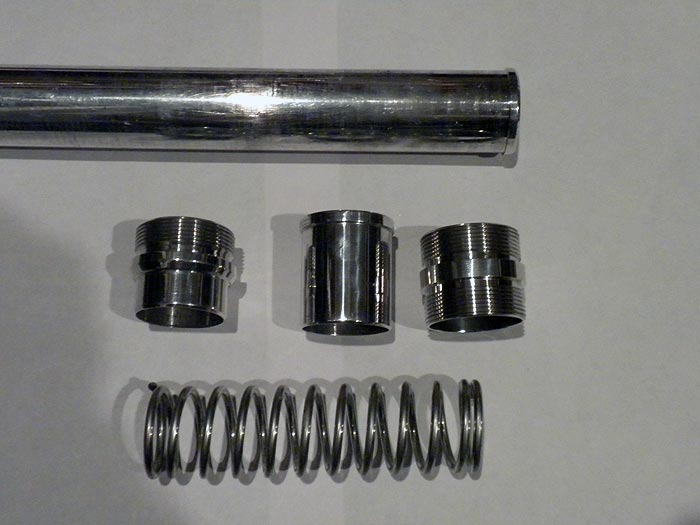
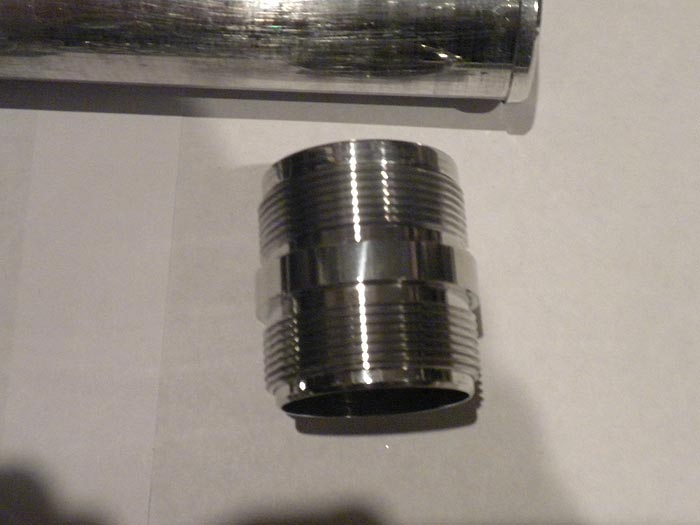
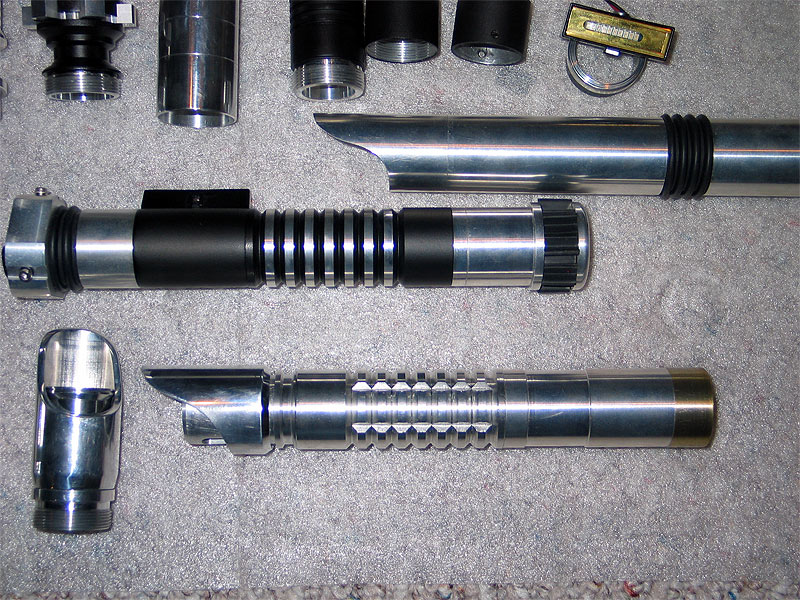
2 x double male threaded connector (old style ones need to be modified... new version will need a custom part sleeve/shim (Super Mario Bros. Tunnel) for them to be compatible... I have used one of each for this demo/display)
a custom OD section of tubing (your sliding 'core').. with a LIP on the end..the same OD as a heatsink
1 x 1.25 OD spring (length to fit your project travel)
the rest of the MHS parts you use is up to you..and how much TRAVEL you want..or how you 'pull it all together'.. this is just the mechanics of getting an expandable hilt going..
this is (was) a WIP.. and if you dont like.. fuck off. ![]()
re-cap:
if you dont like un-completed projects...dont have anything constructive to say.. move along. Im sure there is a conversions section somewhere.
could be a cool effect for a staff too.. double ended, expanding sides/pop-outs..
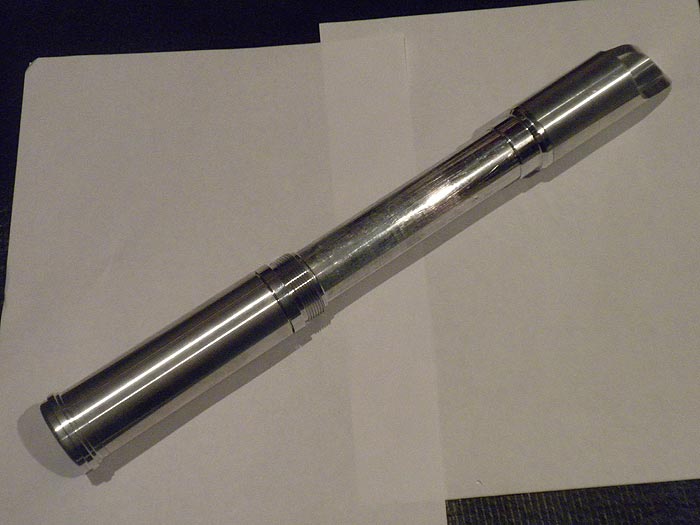
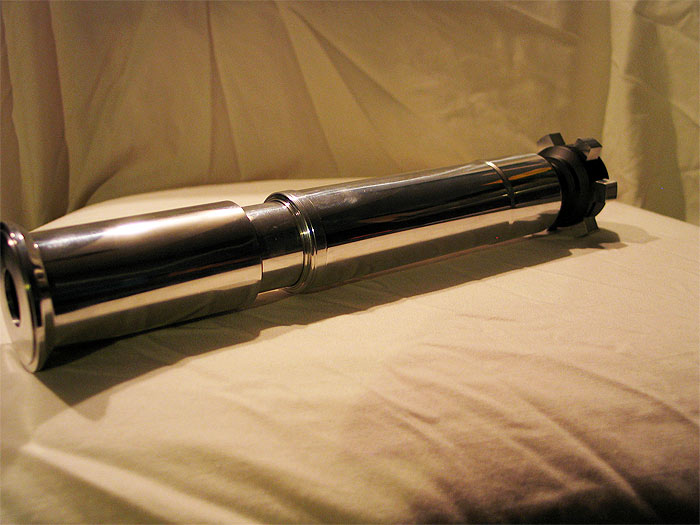
**(taking pics in a little bit)..
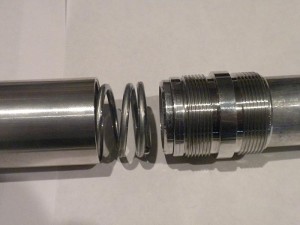
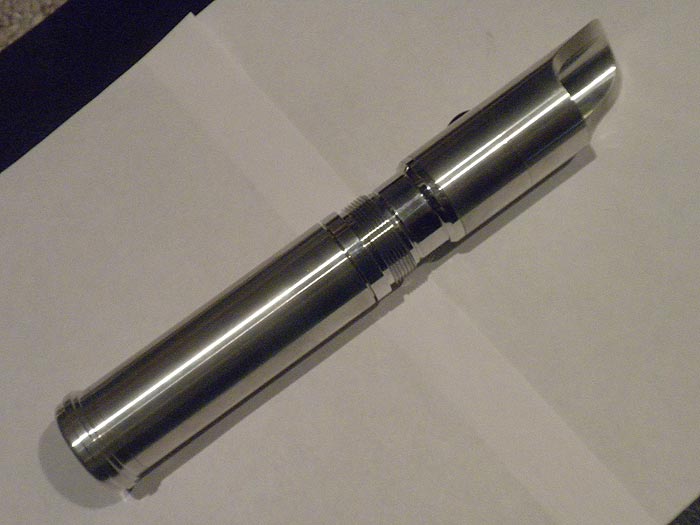
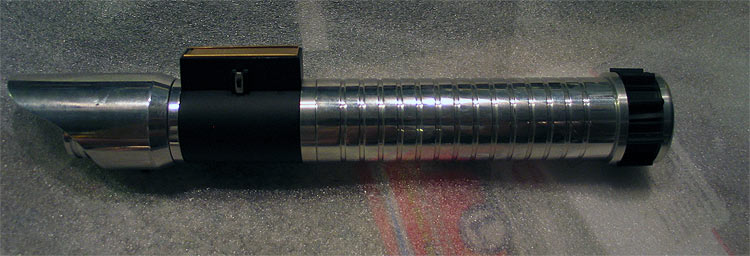
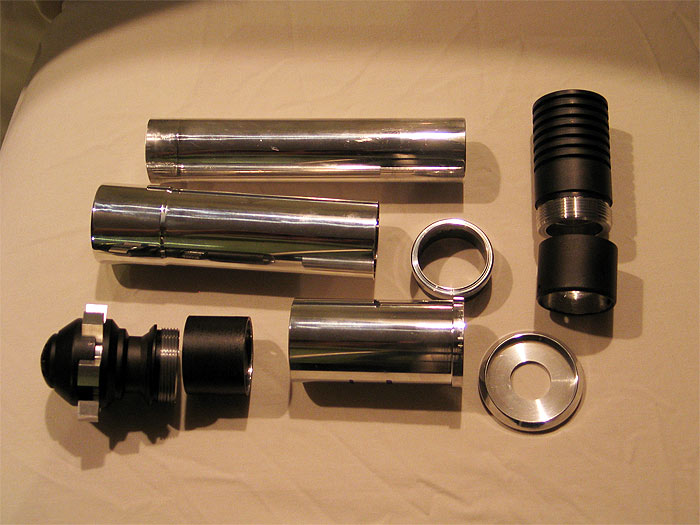
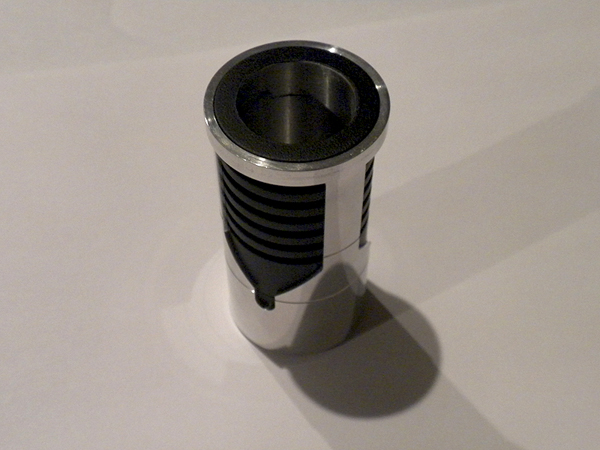
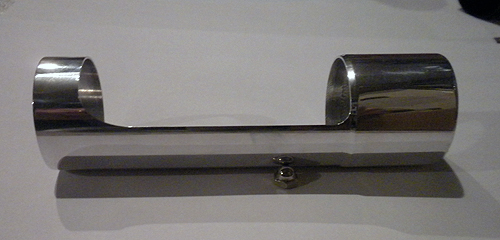
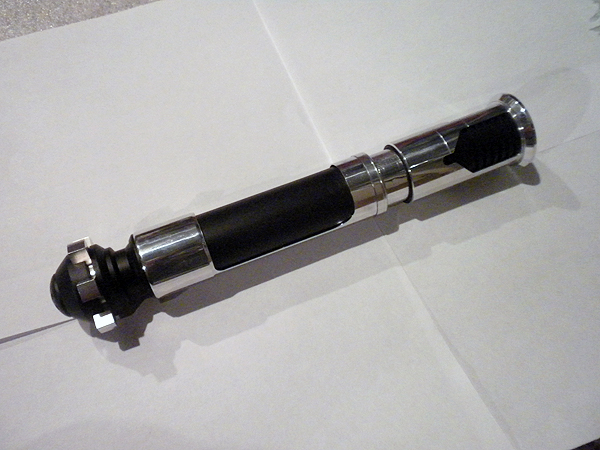
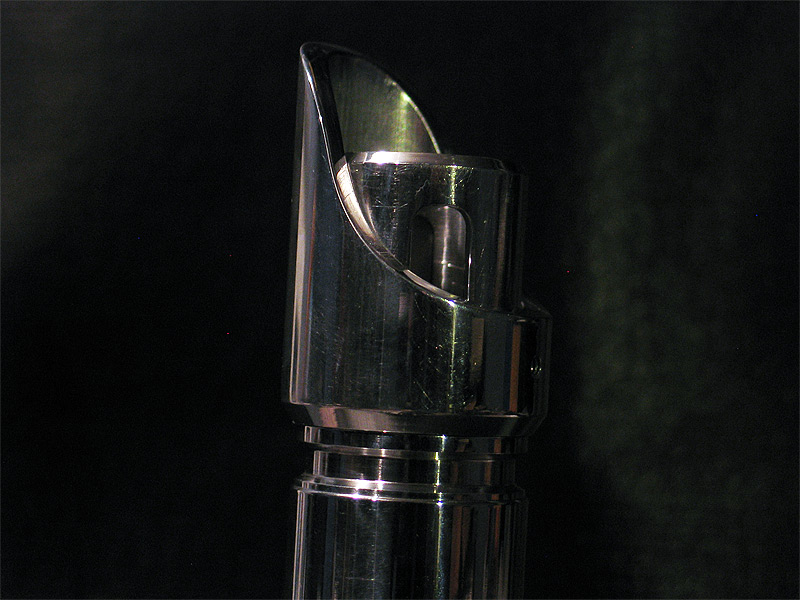
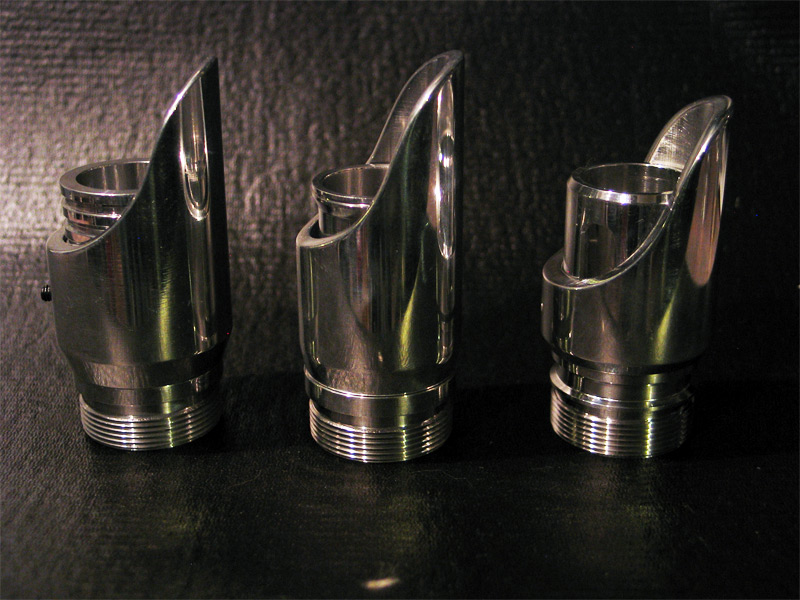
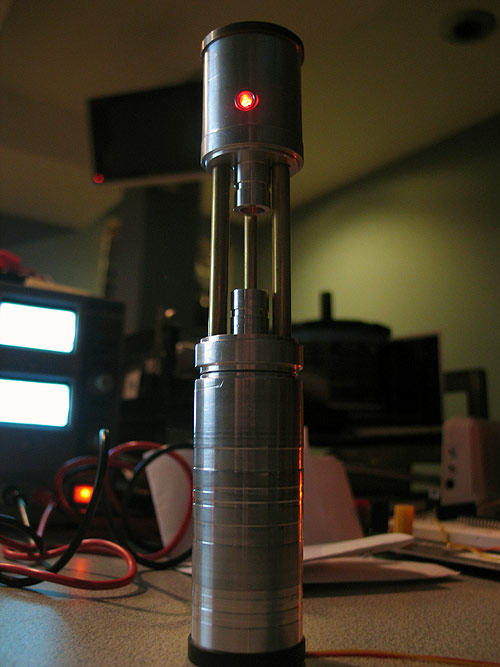
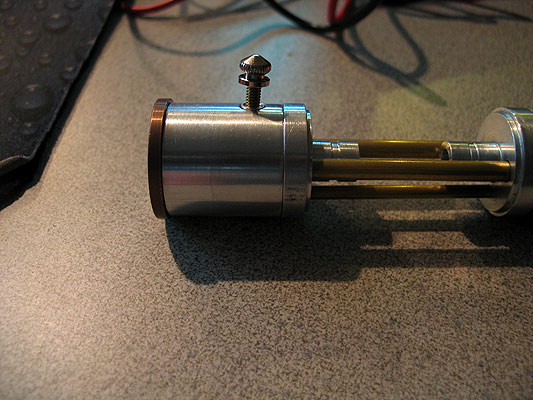
pic of the part(s) used.. you can see BOTH of the double ended male threaded connectors in use here..
the one with the threads left on was/is on purpose to try a certain 'locking approach'
if not using that route for locking..the threads would be turned down/off to mirror the other adapter/collar
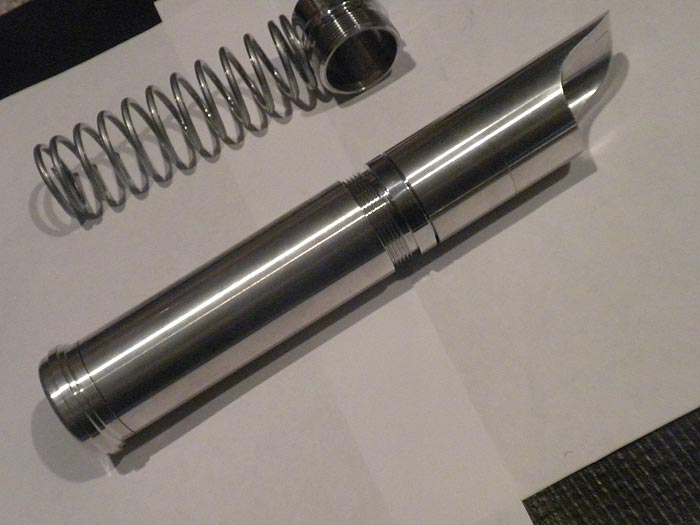
you can see the collar/sleeve fix I had to make for the the lack of OG adapter part..and to be used with the new ID ones. (looks like a Super Mario bros. tunnel)..it slides inside the adapter (new version style)
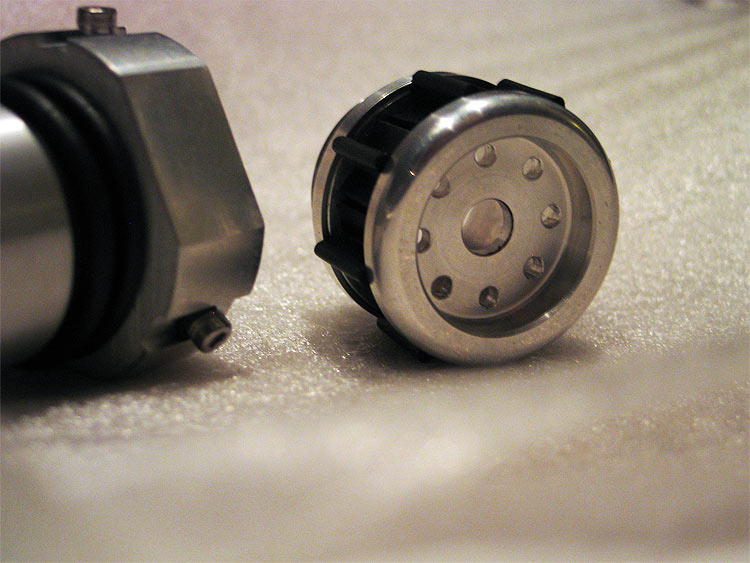
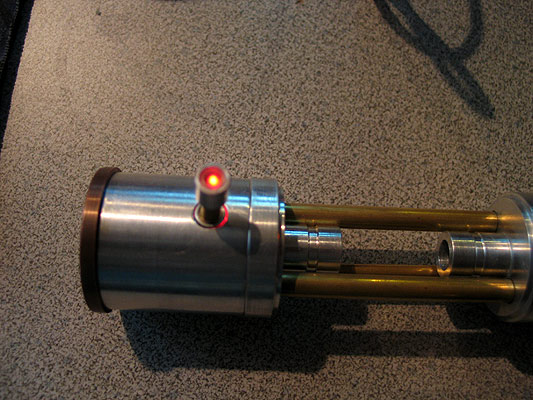
spring and 'core' as well pictured.
fitment is great on all parts! (happy with it)
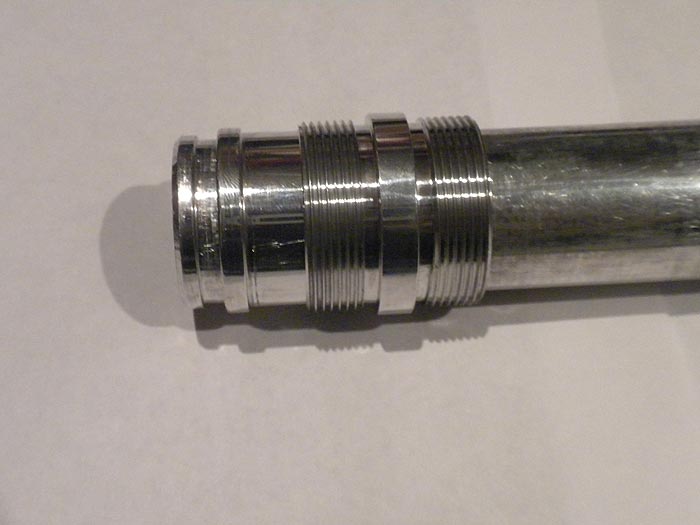
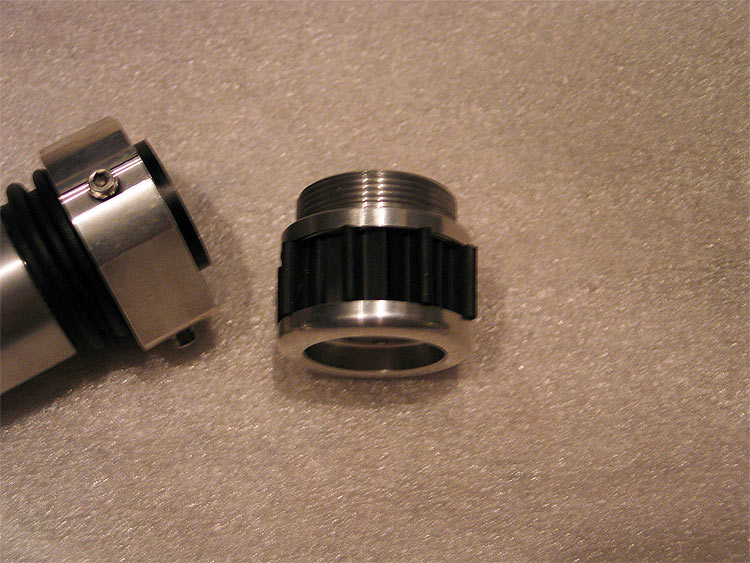
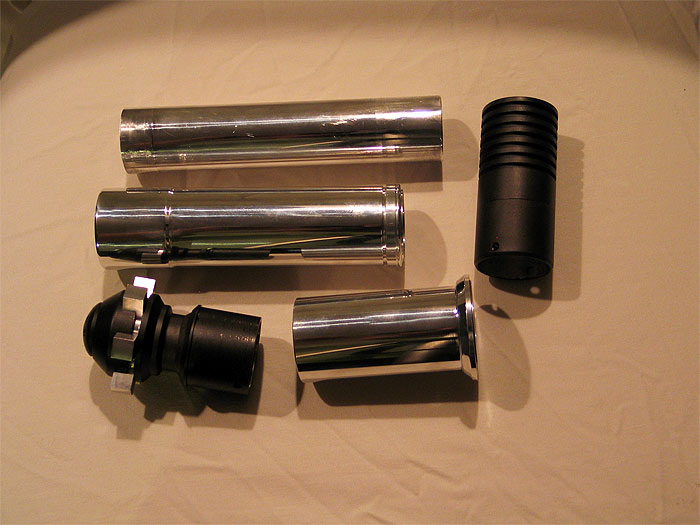
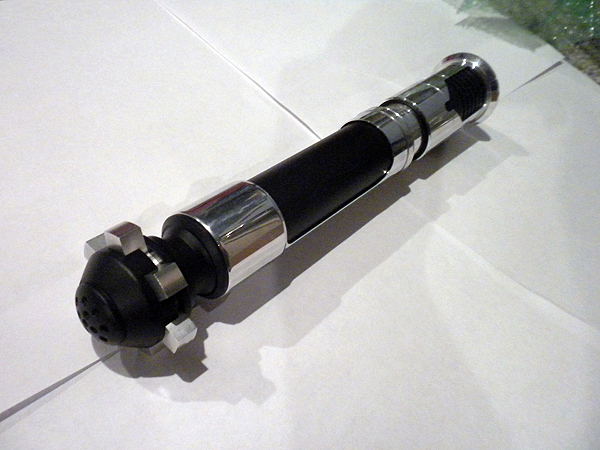
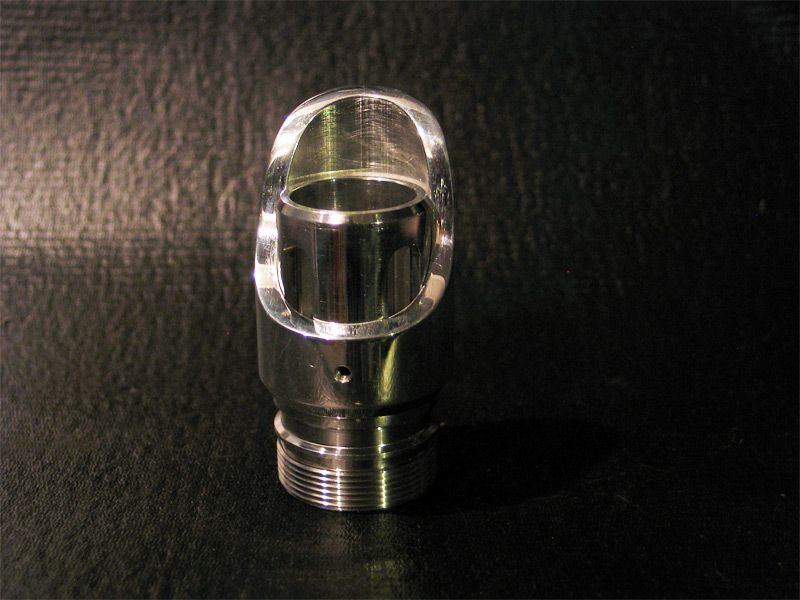
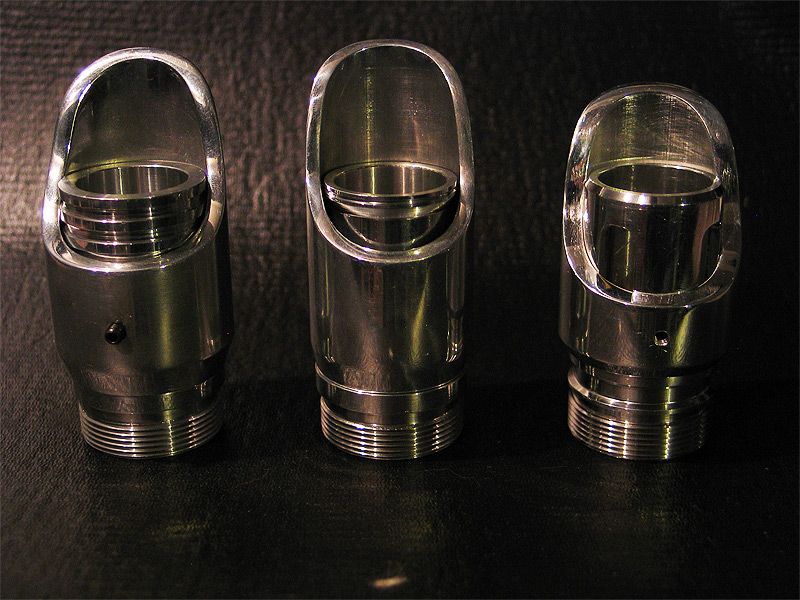
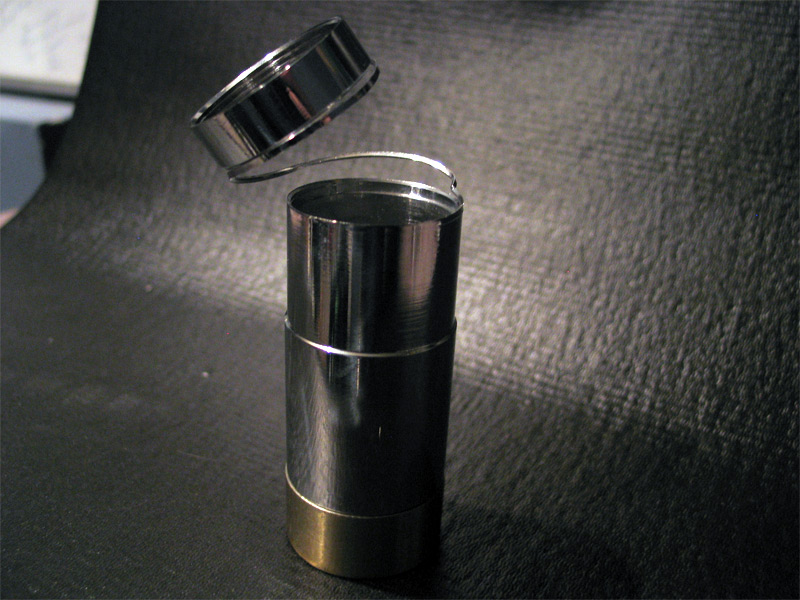
OG Double Male Threaded Adapter, that has been bored out..and the threads turned down: (reminds me of brass bastard a bit)..
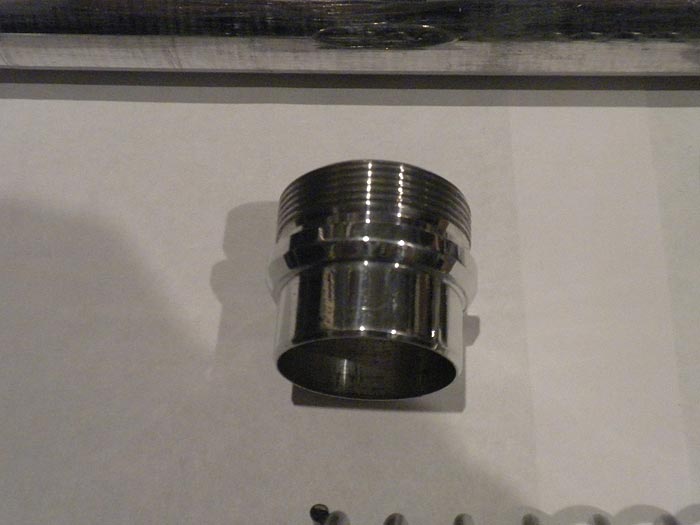
and would look great for dressing a choke to a regular MHS part normally..not in conjunction with this sliding/expanding project
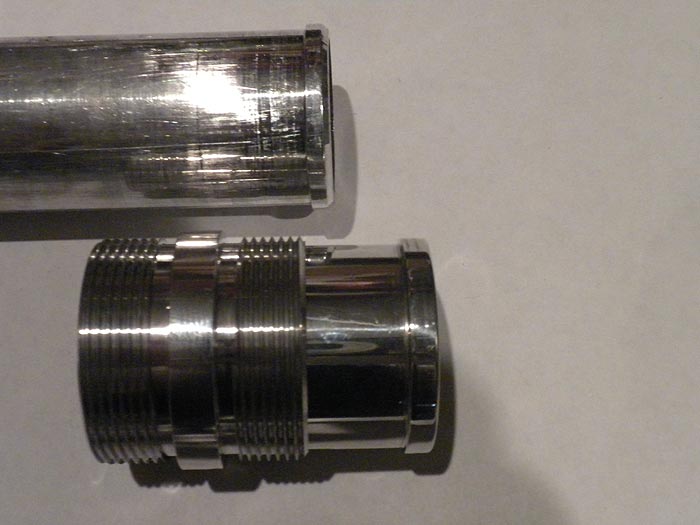
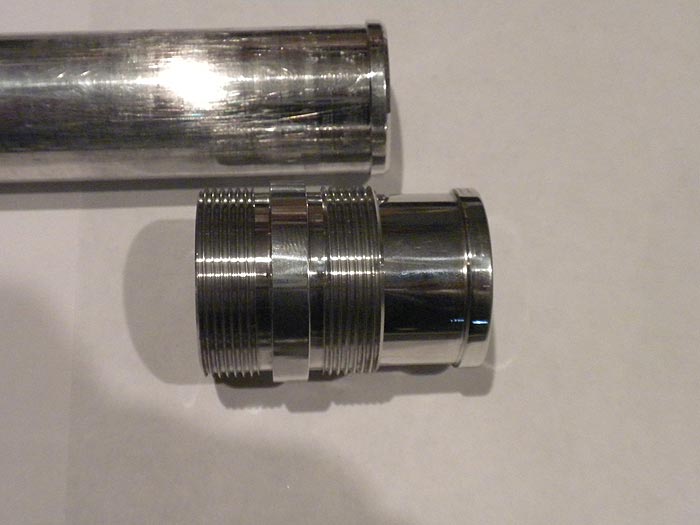
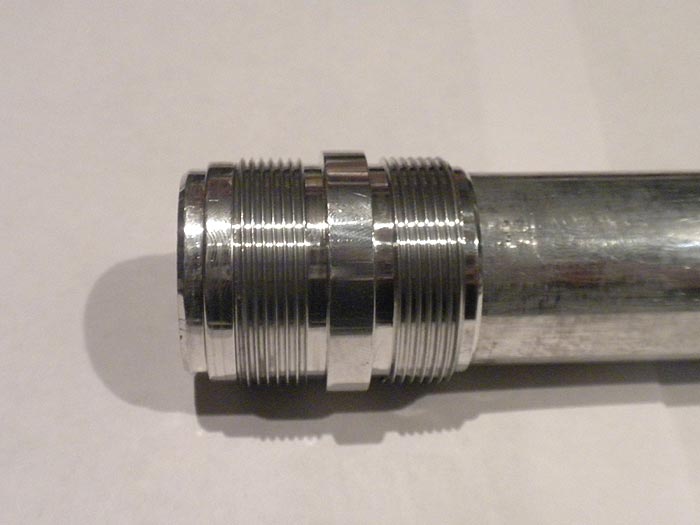
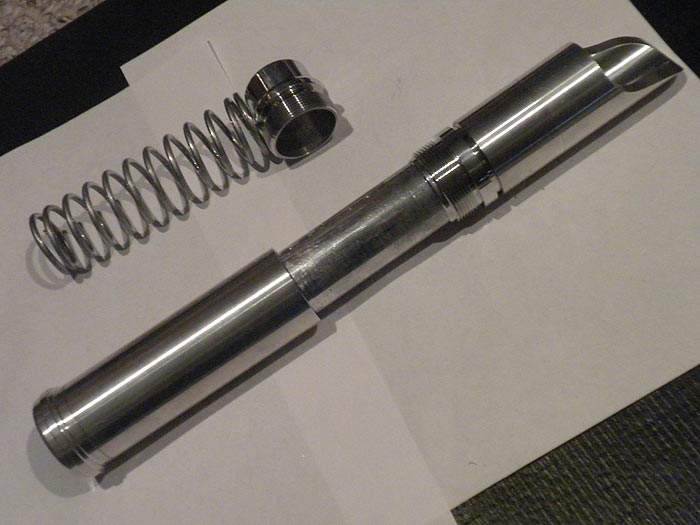
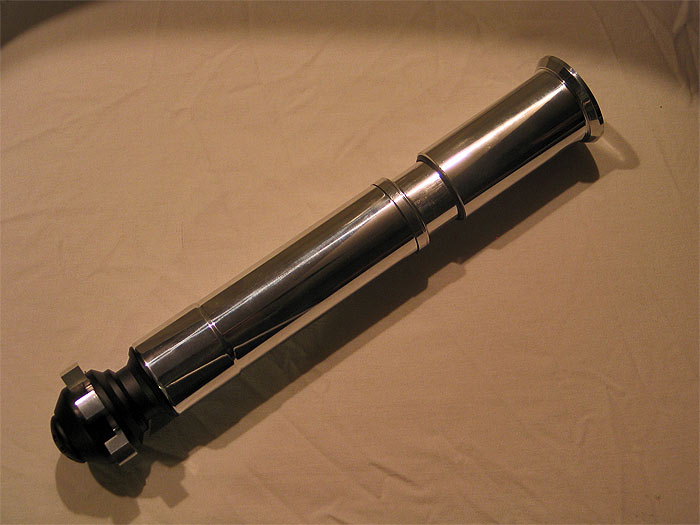
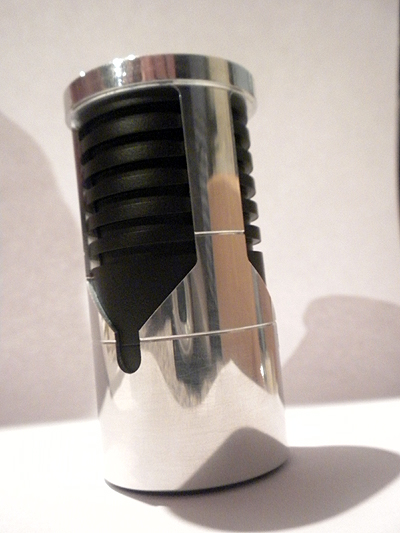
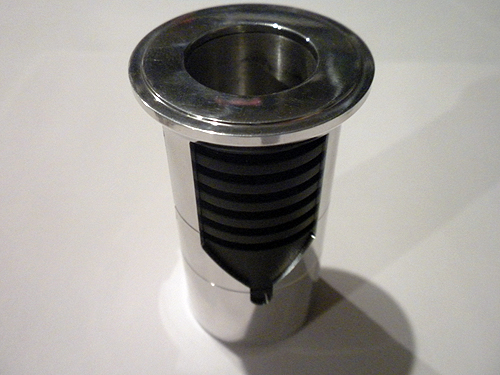
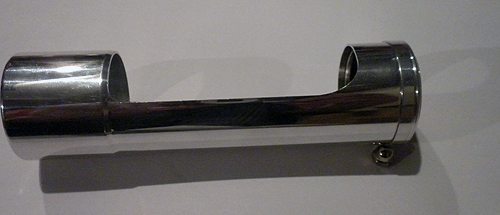
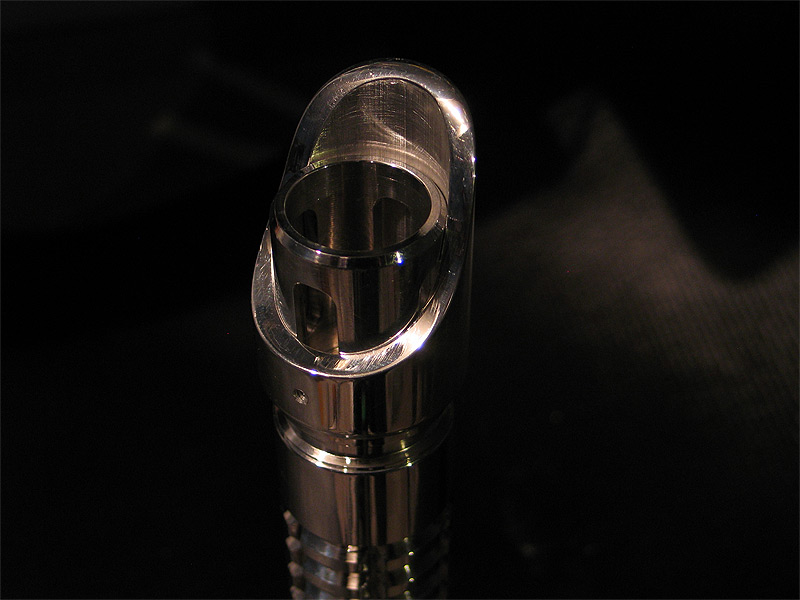
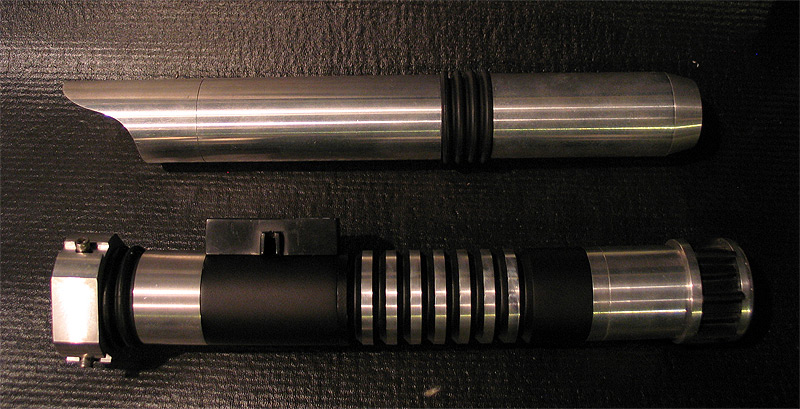
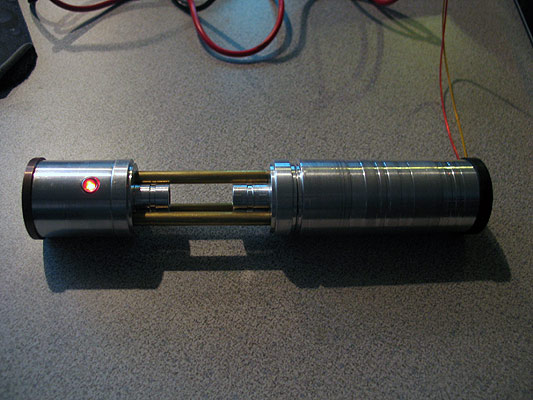
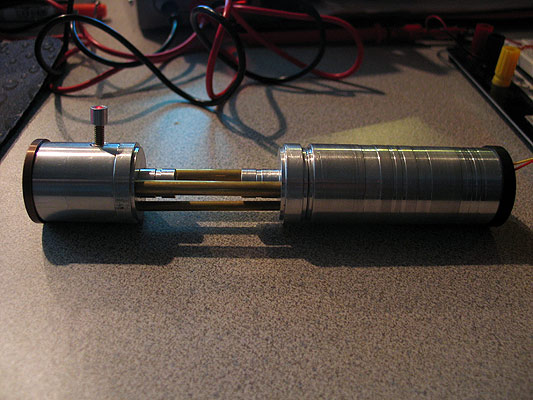
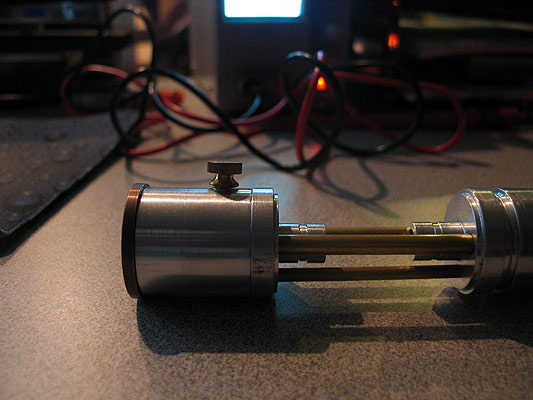
here it is one of the possible 'closed' states: (in this version since BOTH pieces have the external collars... the threads would be turned down.. to match the top collar..)
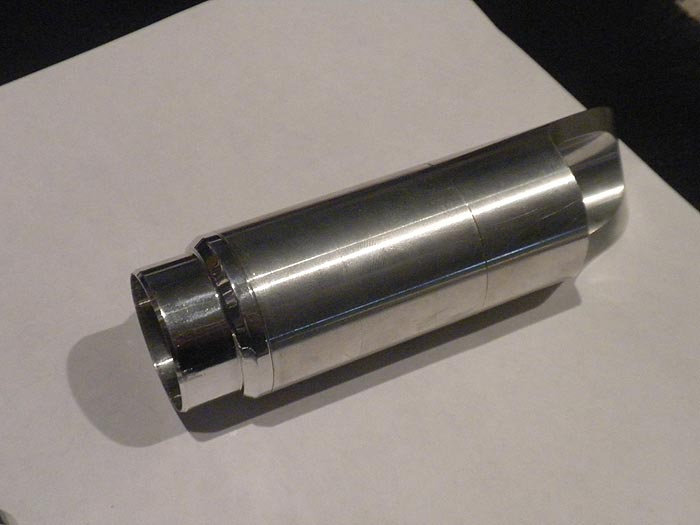
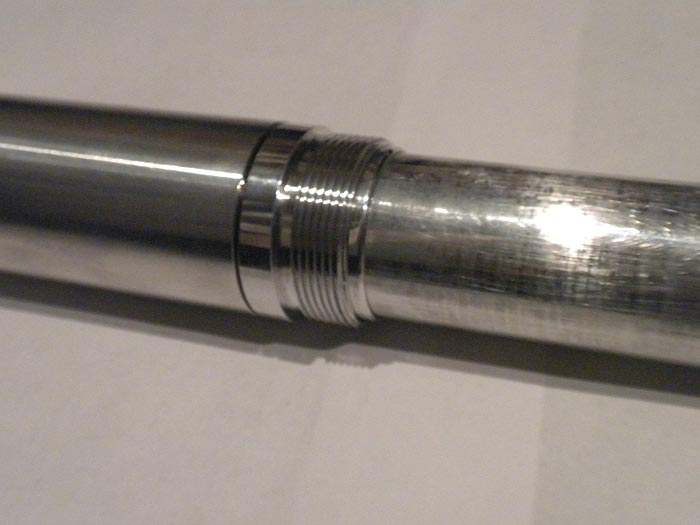
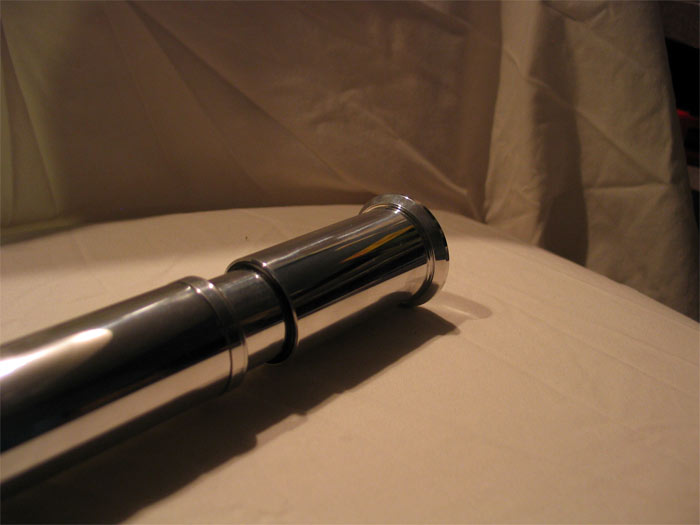
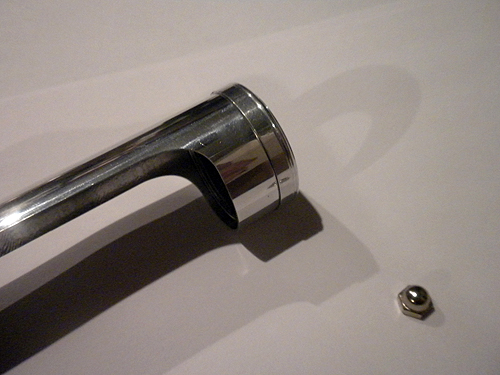
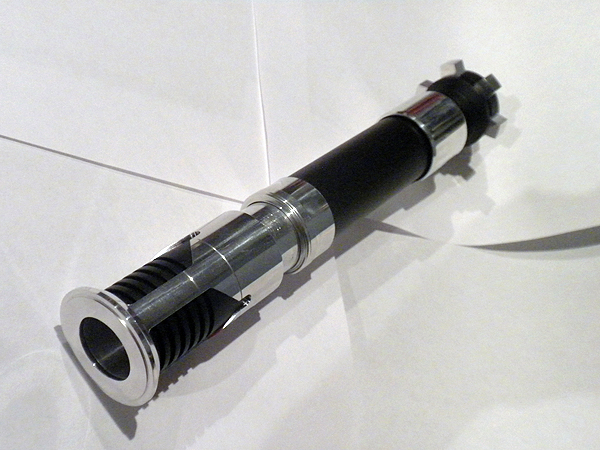
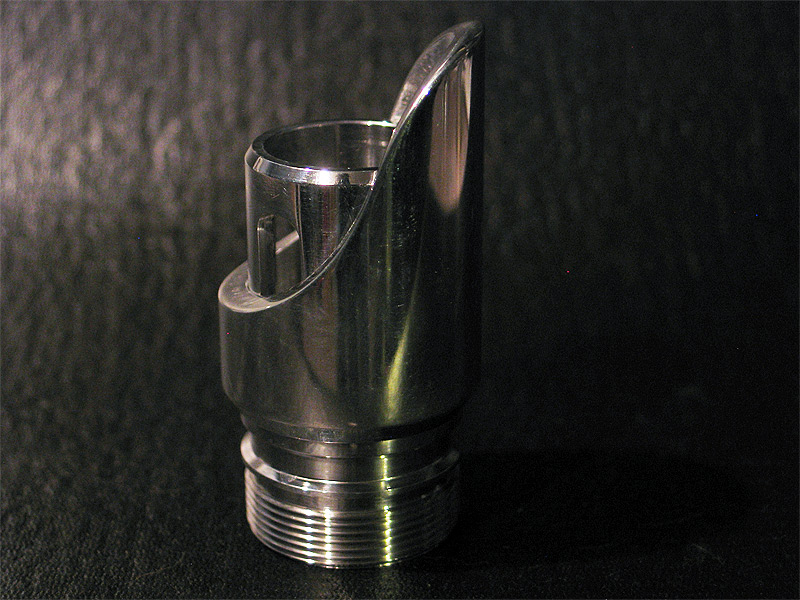
a better look at the 'core' (sliding system)

using the adapter..and leaving a lip on the core/tube..
I can screw it right into any MHS male part.. and effectively have a 'plunger' now.. the core tube will NOT come out. (not does it spin either surprisingly)
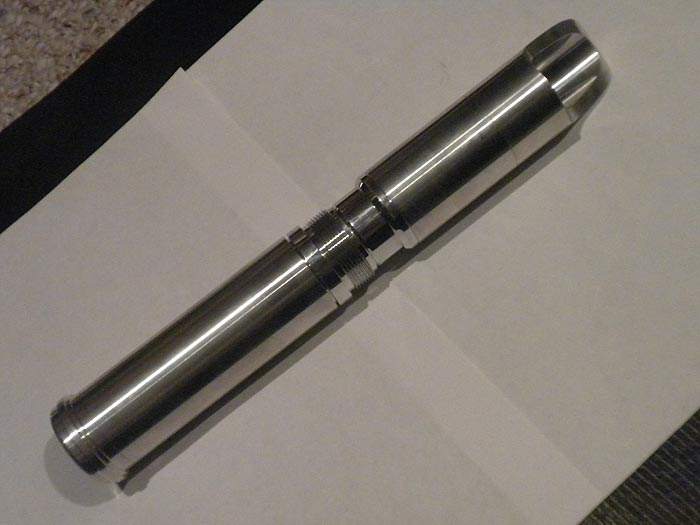
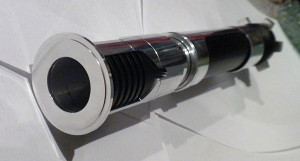
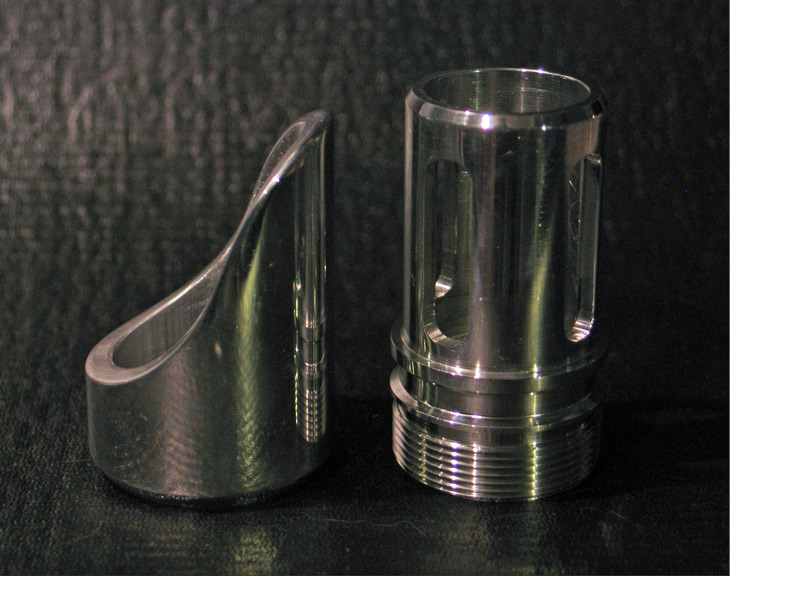
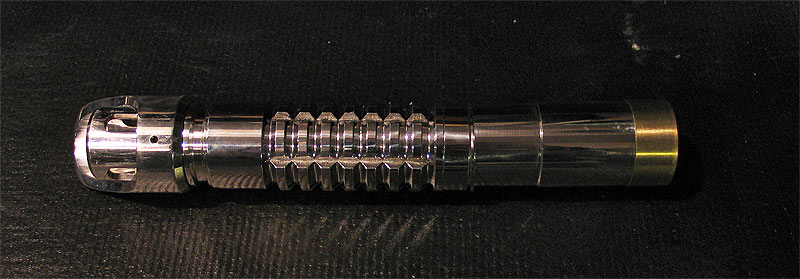
please excuse the super long-ness.. I have NOT committed to cutting the core/tube yet, until I am SURE on the levels of expansion and the locking portion of this project

rant:
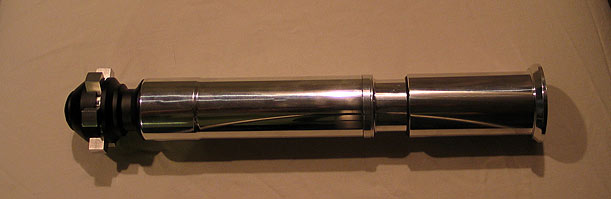
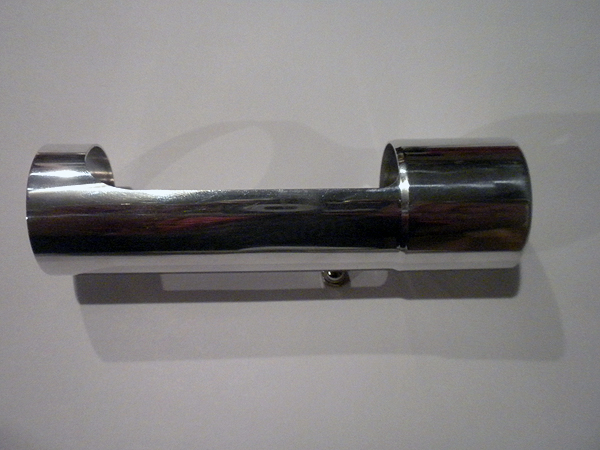
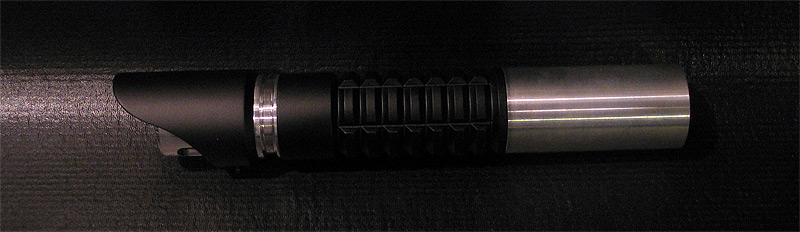
(the longer the MHS part..the more travel, you can obviously get.... however that doesnt leave much for practicality in the visuals or the design.. since you dont really want a SUPER long, goose necked choke/core.. a nice 3 inches looks good visually ... but you also want the smallest footprint you can do when the saber is closed...unless its more for a quick effect or on a staff or something.... so that means shorter MHS parts.. and back to less travel then... however you can make both the top section..and the middle/core tube BOTH expand while holding the grip section) so you need to play with balance & direction a bit.
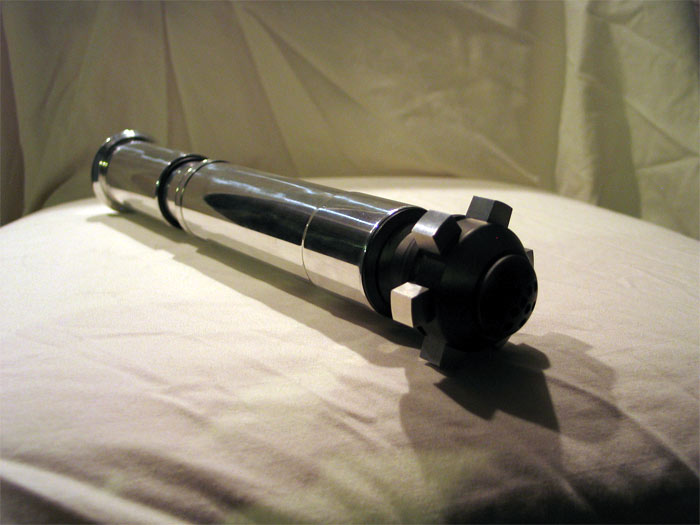
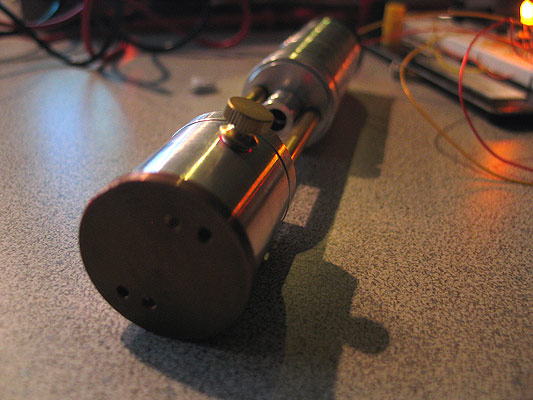
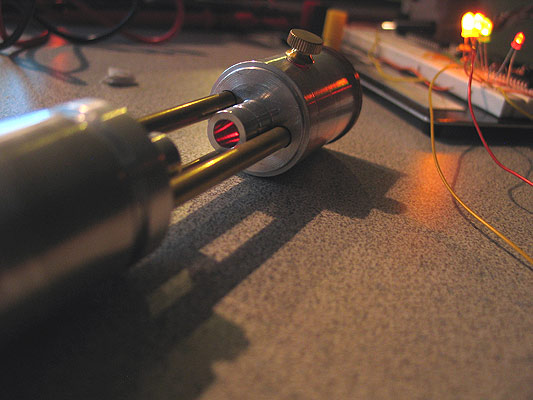
Locking approach #1:
forget the bottom 'collar'.. I have an internal 'ring' that supports the core/tube still.. but I leave the threads on the top collar..
collapse..and then spin the handle portion to lock into place?
un-screw...pop:
LOTS of paths I can take here.. with locking (hard part).. and choosing the expansion path more than one section expanding? or just one?..etc
cold here, not to mention time is absent alot these days... so like the bearing chassis pommel lock mod...figured Id just share what I have.. maybe it will help someone else.. (not to mention this one I could use some ideas on)
AoF Pommel (mod)

AoF Pommel (mod)
Got some pommels made from Randy a few (years?) back now...
they were oversized (OD).. because most MHS pommels were stock OD..
it is very similar to the Jay-Gon pommel #10 that is in production now..
I like them because:
a.) using a shroud/sleeve/overlay isnt BIGGER than the pommel OD now..
b.) it helps 'lock' in overlays because they cant slip past/over the pommel..
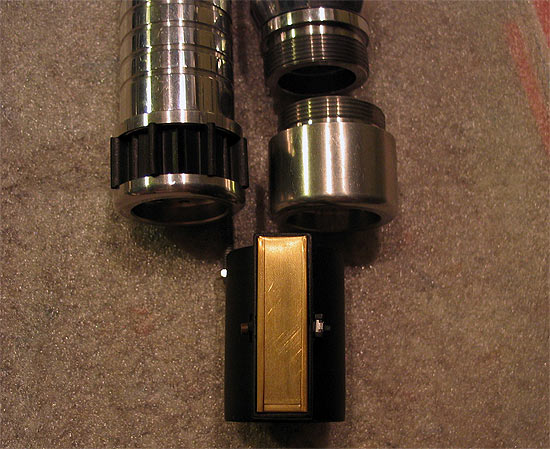
You can see an original one on the right...and the mod'd one on the left.
(some turning down..and trimmed up t-track)
on a hilt/extension section:
Close ups:
Custom/MHS OBI-TPM (hybrid)
ok..so this has been on the burner.. for....well for a long time actually.. I sorted started it when I saw Obi-Dar posted his build start...
it was shelved.. as I didnt care for the route I was taking at that moment....
anyways did some more work on it.. and here is where I am at.. figured Id get some feedback..
I think it looks a bit 'weird' to me because there are no cut-outs in the shroud/emitter yet..(Im hoping thats all it is!..lol)
as far as being an 'exact dup' in dimensions.. its of course not.. (its no ACE OBI TPM to be sure, spot on with awesome machining) ![]() .. 'but'..its not that far off from the dimensions I got on-line.... the most notable place is the main hilt 'OD'.. which will mostly be cut away so I dont think it will have that much effect on the final look... every thing else is exact or a not 'too bad'...
.. 'but'..its not that far off from the dimensions I got on-line.... the most notable place is the main hilt 'OD'.. which will mostly be cut away so I dont think it will have that much effect on the final look... every thing else is exact or a not 'too bad'...
overall length is over 11".. but little under 11.5 if I recall..
feedback is appreciated of course. ![]() things/areas to work on.. (although its not complete of course).. or things that should be re-done perhaps?
things/areas to work on.. (although its not complete of course).. or things that should be re-done perhaps?
Thanks.
(Im no photographer!)
The parts used:
1 x Ace Obi TPM pommel
2 x 1.5 sink tube adapters (turned down to be 1.39 OD and faced to be roughly over 1")
1 x 1.25 'core' aluminum tube so it has a 1.25 choke section ![]() (slightly modified to meet ID of one of the adapters I used)
(slightly modified to meet ID of one of the adapters I used)
1 x MHS BH #3 turned down to be 1.39 OD)
1 x custom hilt shroud ID bored to 1.39...OD to match the TPM as best I could..
1 x custom shroud ring/support for the top end which has a bit larger OD and design
1 x custom emitter shroud ID bored to 1.39 (OD has a bit of a lip/larger OD than the rest for the 'top ring")
1 x custom 'ring' taking a cue from Randy/Obi-Dar's build of course.. (and because I fubar'd my 1 piece attempt the first go-around) (DOH!) :dft001:
All parts
Rings attached:
Top section:
Side:
Angle:
Full:
Last:
The OD of the ring needs to be opened up to 1" to accept a blade still.. but thats really only about 10 minutes of work to do..
if it passes the test(s).. then I'll work on the shrouds or something.. wire it up.. and see what board it gets (if any)..
if it goes over well.. I always have the 'rule of two' for builds.. and there is parts to make another ![]()
Thanks gang.
-------------------------[update II]------------------------------------
just some quick update shots:
got the 3 windows in the top emitter shroud and the window in the grip shroud cut out by Tim (great work too, thanks Tim)
bike value
some bezels
and the delrin 'grip section' and I can focus on internals..
not sure if it will be than board/battery pack etc...
not too much room for a chassis!
some pics.
(I think she is turning out very nice.. no "Erik/Ace" version!..lol.. but nice to me!) and not too fat/chubby.
the shroud and BH fit like a glove.... and Tim's window cutout make it look so nice.
I put the lines/grooves in just about the perfect spot with the BH and the modified adapter 'seam' makes it less noticeable
Heres a pic with the ring on and all together.. (pic isnt so great..its look nice in person.)
more pics of the sleeve I turned down..with slight dip/bevel that i sent to Tim to be cut out.
A pic with the sleeve and the 'collar/ring' for the 1.25 inner and sleeve connector/support. (this part is being re-done for better tolerance fit....that god its not a hard part at all!..)
Some side/full length views:
no delrin inner grip section.. just a 'temp' all black filler...lol

hopefully I'll get some free time to wrap up the hilt stuff.
Thanks
Custom MHS BH #3:
I posted asking a few questions on PC'ing..
this was inspired a while back from Big EZ's Tactile build.. (which seems to have been a trend lately)... but was supposed to have a 'trigger guard' built in..
it does.. but Im not 100% happy with it.. (taken from a toy gun from my kids).. looks 'ok' after paint (maybe better)..
I have one more guard I wanna try (hoping it will fit better or a mount solution will reveal itself to me!)
anyways..
here are some pics of the WIP build..
modified BH
custom shroud
v-groove
3" extension (modified)
stock MHS pommel
I also fubar'd my 3" extension.. (pics below)..LOL
so I need to grab another off the bench and mod it again.... goes to show.. do NOT PUSH the amount you can turn down an MHS part! (especially by the threads!)
anyways.. figured Id post a few pics.. and what NOT to do to your MHS parts! LOL.
before I messed up the 3" extension:
Broken piece in place:
all three mod'd BH's with custom shrouds (3 so far...and I think last..I have 3 'longer' versions that are similar to a 'graflex' top in length (not quite) that go over not only the BH's..but part of the main body as well..... too bad it'll be seen as a rip of Slothfurnace graflex build that uses it...cause the firstone is very similar.
some other junk too.. my first red/sith build (bottom)
and an attempt to make a 'clean'.. future'ish saber.. very clean..nothing but liquid chrome 'look'.. (working on the MC type buttons..but a bit more 'recessed'
and my mistake: =(
any thoughts or ides on the trigger/guard is appreciated.. Im really NOT digging using plastic or salvaged from a toy.... but not sure what else?
-----------------------------------------------------------------------------
I PC'd it..
as well as the v-groove..
still on the fence
1.) do I remove the PC from the 'ribs/nubs' on the v-groove? (and pc them trans gold?)
2.) do I do everything that is in bare aluminum in trans gold? (nubs and BH..and pommel)
keep in mind the 3" exntension is there as a filler..cause the other one broke.. needs to be turned down still.. and some visual mods/grooves added..
that will also be black.
suggestions on 1 & 2?
sorry only one pic ATM... the others were kaka..
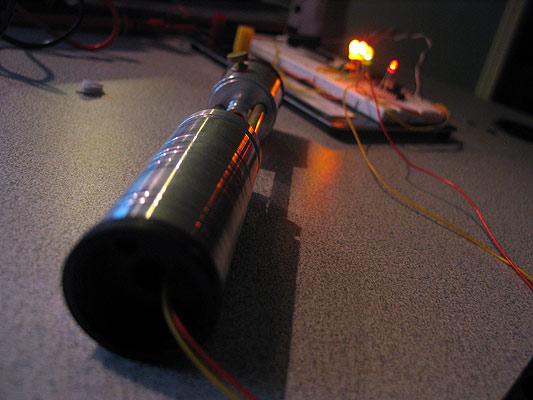
xCore: #1 (HAL)

I dont think I ever posted these (I didnt see them at least in this thread)
I expanded on my 'xCore' (cough cough)..lol..
to make in more like others (Goodman, Big Ez commented on..etc..etc) about making the 'core' a stand alone unit..
I tried to make it generic enough to work as many build as possible.. (chokes etc..probably wont work without custom install & wiring..)
I made a couple like this where the battery pack, crystal chamber, LED & switch housing is all on unit.
I can fit 2AA & a USB board in the battery compartment, behind the speaker....so speaker, battery & US board.. think of TCSS all-in-one sound system with a 'sleeve' over it..
I went for mounting the switch as HIGH as possible tot he LED as I could.. about 1" down from TOP of led heatsink )a lot less from bottom of heatsink)
the 'crystal' stems/holders both were made to hold 3mm chrome bezels from RadioShack.. the backs are count ersunk to hold nut and screw in place to lock.
so each one 'can' have an led in it same color, different colors.. RGB accent leds..etc..
I dont have any crystals yet to play with..
but the led holder stems will be cut down (faced) to make them a little smaller....as well as the brass rods/threaded rods.. to match whatever crystal I end up using.
right now I think its about little over 1" long crystal room..
after final cuts, it will be around 6.5" I'd say..
these were all rough cuts, eyeing things up for the most part.... using junk/crappy jigs..
once I get some measurements, prototype results..I can make some nicer ones sanded and polished..etc..
switch is illuminated switch of course..
you can see light here..
checking out different 'stems' and switch caps/heads... most have hole drilled in shaft to let light through..
most of the sections are 'modular'.. and can be broken off from the 'main' core (if you will).. to work with specific saber designs..
all of these of course take advantage of the MHS 'locking' feature for the speaker and/or the heatsink..
I 'piggy' back off one of those (depending on the saber design and the core design).. and use that part to lock & secure my whole core down.
in these pics.. they are actually in-accurate.. that is a stock width speaker holder I am using..
however (unless I measure perfectly).. because I am using the heatsink to lock my core down..I need to turn down the the OD of the speaker holder...so it can fit inside of the hilt body...
the holder needs to be turned down 'slightly' t be used with the sleeve/bucket.. but the OD needs to be turned down more for it to fit into a MHS hilt..
wiring is tricky..you can only get some many wires up the small 'false tube'.. I think I got 7 or 8 up there..small gauge.
and getting 2AA and a US board in there..take some serious Eastern cram-fu. but it works.
I think I can make that small OD false brass rod a bigger (normal sized) one to allow for more wire room.
anyways.. its pretty clean wire wise. all hidden.
some decorative lathe & mill work on the parts/sleeve and they could be pretty slick looking.
feedback appreciated..
thanks